An alternative to typed.js

Dynamic Smooth type Reveal Animation
Webflow

Smooth text reveal animation in just few steps, attribute solution. Smooth Type Reveal Animations to Captivate Audiences

1. Importing SplitType  and gsap

To access SplitType and GSAP via CDN, first, locate their respective CDN URLs on a service like jsDelivr.

  • For GSAP, you can find the URL by visiting the GSAP website or searching for "GSAP CDN" online. Once you have the GSAP CDN URL, you can include it in your HTML file within a script tag.

  • Similarly, for SplitType, locate its CDN URL and include it in another script tag in your HTML file.

Make sure to place these script tags before your custom JavaScript code to ensure that SplitType and GSAP are available when your script runs. Once included, you can start using the functionality provided by SplitType and GSAP in your project.

<script src="https://unpkg.com/split-type"></script>
<script src="https://cdnjs.cloudflare.com/ajax/libs/gsap/3.12.2/gsap.min.js"></script>

2. Add this Code before closing /body tag

1<script>
2  // Content array
3  const content = ['Webflow', 'G-sap', 'Branding', 'Marketing', 'Social-media']
4  // Emptying the span 
5  const wrapper = document.querySelector('.text_type')
6  wrapper.innerHTML = ''
7
8  // Adding array data to span
9  content.forEach((item) => {
10    const html = `<span style='position:absolute; top:0; left: 0;'>${item}</span>`
11    wrapper.innerHTML += html
12  })
13
14  // Breaking text into words/chars
15  const text = [...wrapper.querySelectorAll('span')].map((item) => {
16    return new SplitType(item)
17  })
18
19  // DELAY between each word
20  const DELAY = 3
21
22  // Setting initial state for all the words
23  text.forEach((item) => {
24    gsap.set(item.chars, {
25      opacity: 0,
26    })
27  })
28  // Making first word visible on initially
29  gsap.set(text[0].chars, {
30    opacity: 1,
31  })
32
33  // Initiating timeline
34  const tl = gsap.timeline({
35    repeat: -1,
36  })
37
38  // Start with First Word
39  tl.fromTo(
40    text[0].chars.reverse(),
41    {
42      autoAlpha: 1,
43    },
44    {
45      autoAlpha: 0,
46      delay: DELAY,
47      stagger: 0.1,
48      onComplete: () => {
49        text[0].chars.reverse()
50      },
51    }
52  )
53  // Loop all the words in the middle
54  for (let i = 1; i < content.length; i++) {
55    tl.fromTo(
56      text[i].chars,
57      {
58        autoAlpha: 0,
59      },
60      {
61        autoAlpha: 1,
62        // YOU CAN CHANGE DELAY BETWEEN EACH CHARACTER BY CHANGING STAGGER VALUE
63        stagger: 0.1,
64      },
65      '>0.2'
66    ).to(text[i].chars.reverse(), {
67      autoAlpha: 0,
68      stagger: 0.1,
69      delay: DELAY,
70      onComplete: () => {
71        text[i].chars.reverse()
72      },
73    })
74  }
75  // Bring first word back
76  tl.to(
77    text[0].chars.reverse(),
78    {
79      autoAlpha: 1,
80      stagger: 0.1,
81    },
82    '>0.2'
83  )
84</script>

3. Add the target class to the html

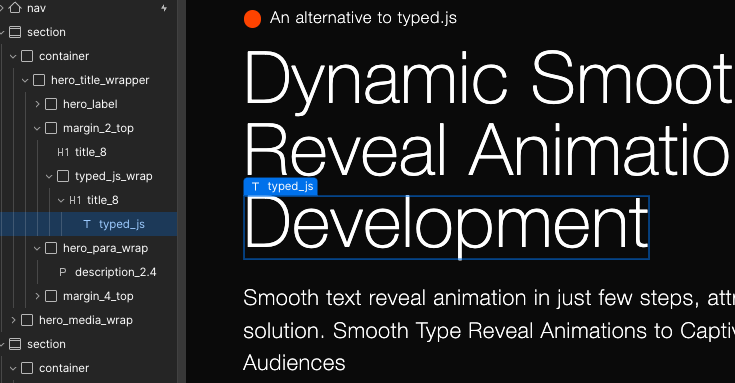
We are targeting a class called typed_js in this code. In our heading class, we've added the class by adding a span. One thing to note is that for the animation to work properly, we have to wrap it in a div which needs to have a fixed height and a relative position. This is because we are emptying and appending that span's element, positioning them absolutely within the wrapper. For more information, please check out the walkthrough video on YouTube.